


Great POV cycling footage does more than show the road ahead. It should make the viewer feel the speed, see how you handle the bike, and understand what the ride actually felt like.
Getting that result usually comes down to three things: where the camera is mounted, how the shot is framed, and whether the settings suit the terrain. For many riders, a chest mount offers the best balance of stability and immersion. A helmet or chin mount gives a more natural eye-level view, while a handlebar mount is convenient but tends to pick up more vibration.
Whatever setup you choose, record a short test clip before the real ride. Check the horizon, make sure the route is clearly visible, and look for movement in the mount. That quick check can save you from coming home with an hour of footage aimed at your front tire.
Which Cycling Camera Mount Should You Use?
|
Filming goal |
Best starting point |
What it does well |
What to watch for |
|
Immersive main POV |
Chest mount |
Shows the trail, arms, and handlebars |
Angle changes as your body moves |
|
Eye-level perspective |
Helmet or chin mount |
Follow where you look |
Head movement can make footage feel busy |
|
Quick, simple setup |
Handlebar or stem mount |
Easy to install and adjust |
Picks up more road and bike vibration |
|
Dramatic supporting shots |
Frame or seatpost mount |
Adds speed and movement |
Usually not strong enough as the only angle |
|
Static and behind-the-scenes clips |
Smartphone tripod or clamp |
Easy to frame while stopped |
Should never be handheld while riding |
|
Route and landscape shots |
Drone |
Adds scale and location context |
Must be filmed safely and legally |
The best cycling POV camera setup depends on your bike, posture, terrain, and the type of video you want to make. A setup that works well on smooth pavement may struggle on gravel or technical trails.

What Do You Need to Film POV Cycling Videos?
You do not need a large production kit. A secure mount, enough battery, a clean lens, and a camera you know how to use will usually matter more than carrying every accessory you own.
Action Camera or Smartphone
For on-bike POV footage, an action camera is usually the practical choice. It is compact, built for movement, and designed to handle wide-angle shooting and electronic stabilization.
A smartphone still has a useful role, especially for:
- Pre-ride introductions
- Bike setup shots
- Rest-stop updates
- Static roadside clips
- Vertical social content
- Behind-the-scenes footage
Use the phone while stationary. Holding or adjusting it while riding is unsafe and rarely produces good footage anyway.
A compact TELESIN phone tripod, clamp, or remote setup works well for riders filming alone. It lets you frame a shot, step into position, and record without needing another person behind the camera.
Cycling Camera Mount
The mount determines far more than where the camera sits. It affects stability, comfort, perspective, and how much of the bike appears in the frame.
Common options include:
- Chest mounts
- Helmet mounts
- Chin mounts
- Handlebar mounts
- Stem mounts
- Frame mounts
- Seatpost mounts
- Choose the mount around the shot you want.
A handlebar mount may be the easiest to install, but it is not always the best camera mount for cycling on rough terrain. A chest mount can look smoother and more immersive, but it needs careful adjustment if you ride in an aggressive forward position.
Safety Tether and Mounting Adapters
A safety tether is a backup, not a substitute for proper installation.
Before setting off, check that:
- The mount is compatible with the camera
- Every buckle and adapter is fully locked
- Screws are secure
- The tether is attached to a solid point
- Nothing interferes with steering, braking, or body movement
Keep the mounting stack as short as possible. Each extra adapter adds another place where movement can develop.
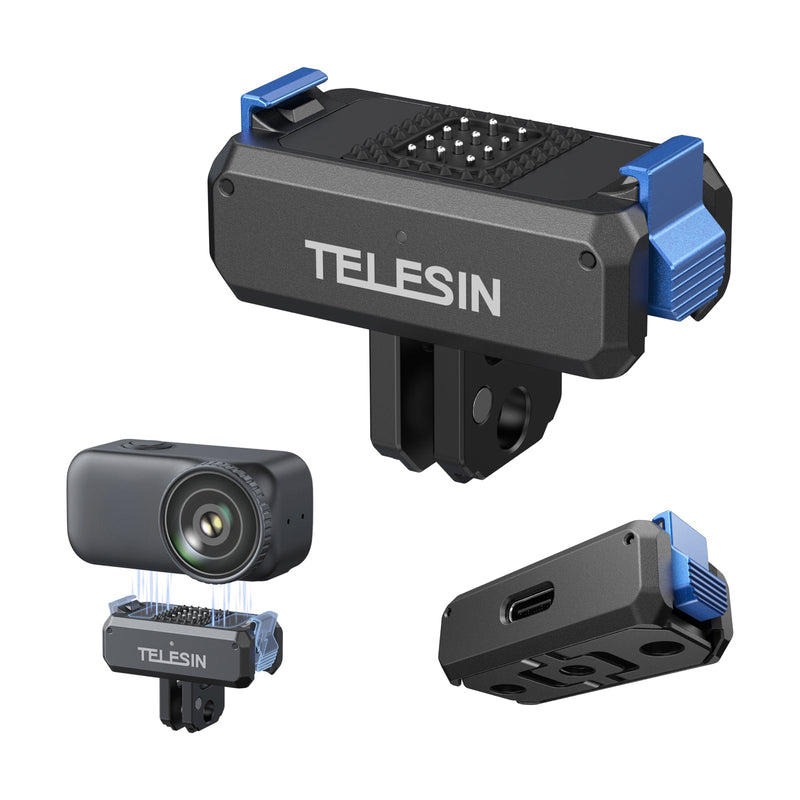
TELESIN quick-release adapters and safety tethers can help simplify an action camera setup for cycling, but the final assembly should still be inspected before every ride.
Batteries, Storage, and Lens Protection
Long rides create practical problems that short test sessions do not.
High-resolution recording, high frame rates, strong stabilization, and wireless connections all consume power. Mud, rain, dust, and fingerprints can also ruin footage even when everything else is set correctly.
Pack what the ride actually requires:
- A charged spare battery
- Enough memory card capacity
- A lens protector
- A microfiber cloth
- A compact storage case
- Weather protection when needed
For longer trips, TELESIN battery chargers, protective cases, and lens accessories can help keep the kit organized without turning it into extra weight you never use.
Which Camera Mount Is Best for Cycling POV Videos?
There is no single winner for every rider. The best choice depends on how you ride, what surface you are on, and what you want the viewer to see.
Chest Mount: Best for an Immersive Main POV
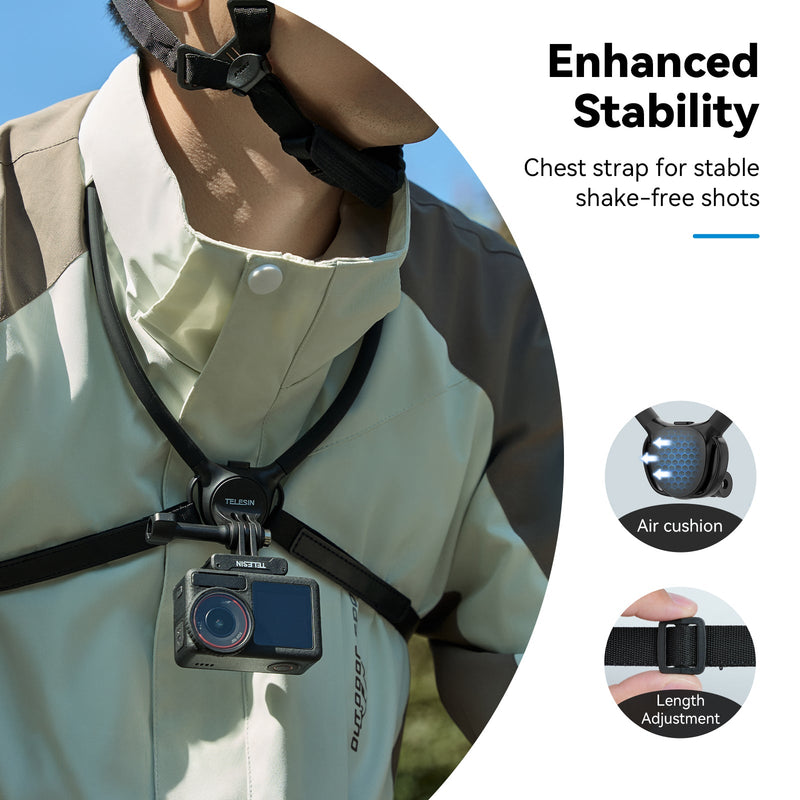
A chest mount is often the most balanced option for first-person cycling footage.
It can show:
- The trail ahead
- Your hands and arms
- Handlebar movement
- Braking and steering
- A strong sense of speed
Because the camera sits close to the center of your body, the footage is less affected by quick head movements than helmet-mounted video.
The main challenge is framing. Many riders lean much farther forward on the bike than they realize. A camera that looks level while standing may point almost entirely at the handlebars once you start riding.
Set the angle while sitting on the bike in your usual position. Test seated pedaling, standing climbing, and descending if those are part of the route.
A properly adjusted TELESIN chest mount can work well for road, gravel, and mountain biking. The straps should feel secure without restricting breathing or shoulder movement.
Helmet or Chin Mount: Best for a Rider’s-Eye View
Helmet and chin mounts place the camera closer to your actual line of sight.
They are useful when:
- You want the footage to follow where you look
- Line choice matters
- You are filming technical sections
- You want less of the bike in the frame
The tradeoff is head movement. Looking into a corner feels natural while riding, but repeated glances can make the video feel unsettled.
A chin mount often gives a more centered view than a top-mounted camera, though the fit depends on the helmet design.
Do not drill into or permanently modify a helmet unless the manufacturer explicitly allows it. The mount must not block your view, alter the fit, or interfere with the helmet’s intended function.
Before using a TELESIN helmet or chin mount, check both compatibility and comfort. A setup that feels fine for five minutes may become distracting during a long ride.
Handlebar or Stem Mount: Best for Convenience
A handlebar or stem mount is easy to install, easy to reach, and simple to reframe.
It works particularly well for:
- Commuting
- Road cycling
- Casual rides
- Smooth bike paths
- Forward-facing route footage
The drawback is vibration. Because the camera is attached directly to the bike, it receives movement from the frame, fork, road surface, and braking forces.
Before fitting a handlebar camera mount, check:
- Bar or stem diameter
- Clamp fit
- Cable clearance
- Space around lights and computers
- Camera distance from the clamp
Whether the angle can be adjusted without adding a long extension
A compact TELESIN handlebar or stem mount can create a clean cycling POV camera setup. Keep the camera close to the mounting point to reduce movement.
Frame or Seatpost Mount: Best for Secondary Angles
Frame and seatpost mounts are useful when you want variety rather than a full ride from one perspective.
They can capture:
- The front or rear wheel
- Pedaling motion
- Suspension movement
- The drivetrain
- Another rider behind you
- A low view of the trail
These angles feel fast and energetic, but they often show too little of the route to carry an entire video.
They are also more exposed to mud, water, and debris. Make sure the camera cannot touch the wheel, pedals, chain, cables, or suspension.
Chest Mount vs. Helmet Mount vs. Handlebar Mount
|
Factor |
Chest mount |
Helmet or chin mount |
Handlebar mount |
|
Immersion |
High |
High |
Medium |
|
View of the bike |
High |
Low to medium |
Medium |
|
Head movement |
Minimal effect |
Strong effect |
No effect |
|
Bike vibration |
Low to medium |
Low |
Medium to high |
|
Setup speed |
Moderate |
Moderate |
Fast |
|
Camera access |
Moderate |
Limited |
Easy |
|
Long-ride comfort |
Depends on fit |
Depends on weight |
Usually good |
|
Best use |
Main POV |
Rider-eye view |
Smooth roads and quick setup |
A strong starting setup is one main chest-mounted angle, then a few shorter clips from a helmet, handlebar, or frame mount.
How to Judge a Cycling Camera Setup
A useful recommendation should be based on more than whether the mount looks good in a product photo.
When comparing cycling camera mounts, pay attention to the same basic factors every time.
Camera and Setup Details
Record:
- Camera model
- Firmware version
- Resolution
- Frame rate
- Field of view
- Stabilization mode
- Mount type
- Number of adapters
- Bike type
- Whether a safety tether was used
These details matter. A full-suspension mountain bike, a rigid commuter, and a road bike will not transmit vibration in the same way.
Route and Riding Conditions
A proper test should include more than one surface.
Useful sections include:
- Smooth asphalt
- Uneven pavement
- Gravel
- Light trail terrain
- Climbing
- Descending
- Seated riding
- Standing pedaling
- Tight turns
Weather and light also affect the result. Wind changes the audio. Shade and low light affect stabilization. Cold temperatures can reduce battery performance.
What to Look For
Compare:
- Footage stability
- Camera-angle consistency
- Mount movement
- Installation time
- Adjustment difficulty
- Rider comfort
- Wind noise
- Interference with bike controls
- Loosening after the ride
Raw clips and side-by-side frames are more useful than vague claims such as “ultra stable.”
Keep the Limits in Mind
No single test represents every rider.
Results change with:
- Bike geometry
- Suspension
- Tire pressure
- Rider height
- Body position
- Camera weight
- Trail surface
- Stabilization software
Treat every recommendation as a starting point, then test it on your own bike.
How to Mount an Action Camera for Cycling
A secure, well-framed mount will improve your footage more than changing camera settings at random.
Step 1: Choose the Right Position
Start with the result you want.
Choose a chest mount for an immersive main POV. Use a helmet or chin mount when you want the camera to follow your line of sight. Pick a handlebar or stem mount when quick setup and easy access matter most.
For a full cycling video, get one main angle working first. Add extra views later.
Step 2: Install the Mount Securely
Inspect every part before installation. Do not use a cracked clamp, damaged buckle, loose adapter, or stretched strap.
Then:
- Position the mount on a stable area.
- Tighten the main fixing point.
- Add only the adapters you need.
- Lock the camera into place.
- Attach a safety tether where appropriate.
- Move the camera gently by hand to check for play.
- Confirm that it cannot reach any moving part.
Secure does not mean overtightened. Excessive force can damage threads, plastic components, or clamps.
Step 3: Set the Angle in Your Riding Position
Do not frame the shot while standing beside the bike.
Sit in your normal riding posture. Use the camera preview or ask someone to check the framing.
Look for:
- A level horizon
- A clear view of the road or trail
- Enough bike in the frame to add context
- No cables, straps, or helmet edges blocking the image
- Enough space above the horizon for climbs and standing sections
Chest-mounted cameras often need to point slightly upward because your torso tilts forward once you start riding.
Step 4: Record a Short Test Clip
Thirty seconds is usually enough.
Include:
- Straight riding
- One turn
- Gentle braking
- Seated pedaling
- Standing pedaling
- A slightly rough section
Watch the clip at normal speed. Check whether the route is clear, the image is level, and the mount remains still.
Step 5: Run a Final Safety Check
Before entering the road or trail, confirm that:
- Every connection is locked
- The camera does not block your view
- Steering and braking are unaffected
- The tether is secure
- The battery is charged
- The memory card has enough space
- Recording can be started safely
If something feels loose, stop and fix it before continuing.

Best Camera Settings for POV Cycling Videos
The best camera settings for cycling depend on speed, light, terrain, battery life, and how you plan to use the footage.
Rather than copying one preset, it helps to understand what each setting changes.
Resolution and Frame Rate
Higher resolution gives you more detail and more room to crop during editing. It also creates larger files and often uses more battery.
A standard frame rate works well for:
- Long rides
- Commuting
- Casual road cycling
- Normal-speed playback
- Lower storage use
A higher frame rate is useful for:
- Fast descents
- Technical mountain biking
- Slow-motion clips
- Quick steering and body movement
The tradeoff is increased storage use and potentially weaker low-light performance.
For many riders, a balanced high-resolution setting is enough for the main ride. Save higher frame rates for short action sections.
Field of View
A wide field of view helps keep the route in frame and creates a stronger sense of speed.
Very wide views can also stretch objects near the edges.
A linear view looks more natural, but it captures less of the surroundings and demands more accurate framing.
Use a wider view for technical trails and unpredictable movement. Use a more natural view when the route is smooth and the camera angle is well controlled.
Image Stabilization
Electronic stabilization can make a big difference on uneven surfaces, but stronger is not always better.
More aggressive stabilization may crop the image. In low light, it can also struggle to correct movement cleanly.
Most importantly, stabilization cannot repair a loose mount. If the camera is physically moving, the footage may still warp, jump, or blur.
Test more than one stabilization level on the same short section.
Shutter Speed, ISO, and White Balance
Automatic settings are the safest choice for most riders because cycling conditions can change quickly.
More experienced users may want to control:
- ISO limits
- White balance
- Exposure compensation
- Shutter speed
Be cautious with fully manual settings on routes that move between open sunlight, shade, tunnels, and changing weather.
A consistently exposed video is usually more useful than a cinematic-looking setup that fails every time the light changes.
Settings by Riding Scenario
|
Riding scenario |
Resolution |
Frame rate |
Field of view |
Stabilization |
|
Casual road ride |
High |
Standard |
Wide or linear |
Standard |
|
Fast descent |
High |
Higher |
Wide |
Strong |
|
Mountain biking |
High |
Standard or higher |
Wide |
Strong |
|
Low-light ride |
Balanced |
Standard or lower |
Wide |
Test carefully |
|
Long-distance ride |
Balanced for battery |
Standard |
Standard |
Standard |
|
Slow-motion clip |
High enough for final output |
High |
Wide |
Enabled |
Different cameras use different names for similar modes, so check the options on your GoPro, DJI Osmo Action, Insta360, or other action camera.
How to Film a POV Cycling Video Step by Step
Once the camera is set up, keep the filming process simple.
Plan the Route and the Story
You do not need a detailed production schedule, but it helps to know:
- Where the interesting sections are
- Where it is safe to stop
- Which direction the light is coming from
- Whether the route includes traffic or pedestrians
- Where you might use a second angle
- Whether drone filming is allowed
- A simple shot list could include:
- Bike and gear details
- A short route introduction
- Main POV footage
- One or two supporting angles
- A rest-stop update
- Environmental shots
- An arrival or closing clip
That is enough to turn a raw ride into a story.
Prepare the Camera Before You Leave
Before mounting it:
- Clean the lens
- Check the memory card
- Confirm battery level
- Choose the recording mode
- Turn on stabilization
- Check the time and date
- Test quick-record, voice, or remote functions
- Turn off unnecessary wireless features if battery life matters
Do not assume voice control will work reliably in wind or traffic noise.
Mount and Frame the Camera
For a main POV, the frame should show:
- The direction of travel
- Enough road or trail to understand what is ahead
- Part of the bike for context
- A reasonably level horizon
Avoid filling half the image with the handlebars unless that is the look you want.
Start Recording Before You Move
Begin recording while stationary. Check the recording indicator, then start riding.
This is safer than trying to press buttons after you are already moving.
Ride Naturally
Do not exaggerate head movement, look repeatedly at the camera, or change your riding style for the shot.
Good POV footage usually comes from riding normally and letting the route create the movement.
When the setup needs adjustment, stop somewhere safe first.
Review a Clip During a Planned Stop
On a longer ride, check one short clip before you get too far.
Look at:
- Camera angle
- Lens cleanliness
- Mount position
- Battery
- Storage
- Wind noise
- Stabilization
Catching a dirty lens or shifted mount halfway through the ride is much better than discovering it at home.

How to Reduce Shaky Cycling Footage
When the footage is unstable, start with the hardware before changing software settings.
Shorten the Mounting Setup
Every extra joint adds another place for movement.
Keep the camera close to the mounting base. Avoid long extension arms unless the shot cannot be achieved any other way.
This matters most on handlebars and frames, where vibration is already coming through the bike.
Recheck Every Connection
A mount may feel secure indoors and loosen after repeated impacts.
Inspect:
- The clamp
- Quick-release buckle
- Camera screw
- Adapter joints
- Strap tension
- Safety tether
Check again after rough terrain or during long rides.
Match the Mount to the Surface
A setup that works on smooth asphalt may fail on rocky trails.
For rougher terrain:
Consider a body-mounted camera
Reduce the number of adapters
Keep the camera close to the base
Use a safety tether
Test on a short section first
For road riding, a handlebar or stem mount may be perfectly adequate.
Do Not Expect Stabilization to Fix Everything
If the footage is still shaky:
- Inspect the mount.
- Shorten the setup.
- Try another position.
- Use a wider field of view.
- Compare stabilization modes.
- Test in better light.
Physical movement should be solved physically first.
Check the Rest of the Bike
Sometimes the camera is not the only source of vibration.
Loose lights, cycling computers, bags, cables, bottle cages, and accessories can create visible shaking or rattling in the audio.
Inspect the surrounding bike setup before blaming the camera.
How to Reduce Wind Noise in Cycling Videos
Wind noise is one of the hardest parts of outdoor cycling audio.
At speed, airflow can overwhelm speech, tire sound, and the environment.
Use a Wind-Reduction Cover
A compatible wind cover can reduce direct airflow over the microphone.
It helps most at low and moderate speeds. It will not always remove wind noise on fast descents or in strong crosswinds.
Make sure it does not block controls, vents, or heat-dissipation areas.
Try Another Microphone Position
A chest-mounted camera sits in a different airflow pattern from a helmet or handlebar camera.
If audio matters, record short samples from more than one position. The best visual angle may not be the best audio position.
Record Audio Separately
A small external recorder can capture:
- Trail ambience
- Bike sounds
- Rider commentary during stops
- Conversations with other riders
- You can sync the sound later.
Add Voice-Over in Editing
For travel, instructional, or story-driven videos, voice-over is often the cleanest solution.
It lets you explain the route and equipment choices without trying to speak clearly while concentrating on the ride.
How to Make POV Cycling Videos More Engaging
One continuous camera angle may be useful for route documentation, but it can feel repetitive in a finished video.
Use One Main Angle and a Few Supporting Shots
Choose one POV as the foundation.
For example:
- Chest mount for the main ride
- Helmet angle for a technical section
- Frame mount for a short wheel shot
- Static roadside camera for a pass-by
Each angle should add something. More cameras do not automatically make a better video.
Use a Smartphone for Static Shots
A phone is ideal for:
- Showing the bike setup
- Introducing the location
- Recording gear preparation
- Filming rest-stop updates
- Capturing vertical clips
- Shooting the rider from a fixed position
A TELESIN smartphone tripod, clamp, selfie stick, or Bluetooth remote can make these shots easier when you are filming alone.
Set everything up while stopped.
Use Drone Footage for Context
Drone shots can show:
- The surrounding landscape
- Route direction
- Elevation
- Trail scale
- The rider’s position in the environment
Use them as opening shots or transitions rather than replacing the first-person view.
Follow local regulations, keep a safe distance from people and vehicles, and never operate a drone while actively riding. A second person should handle the drone, or the rider should be fully stopped.
TELESIN drone storage and outdoor photography accessories can fit naturally into a broader travel-filming kit when the location and rules allow aerial footage.
Capture Establishing, Action, and Detail Shots
A more complete cycling video usually contains three types of footage.
- Establishing shots show the location.
- Action shots show the ride.
- Detail shots show the bike, tires, pedals, gloves, mud, controls, and gear.
Together, they make the experience easier to follow.
Keep the Edit Moving
Cut long sections where nothing changes.
Keep moments such as:
- Climbs and descents
- Surface changes
- Corners
- Overtakes
- Technical features
- Weather shifts
- Rider reactions
- Arrival at a destination
Natural sound can make the video feel more immediate. Use transitions sparingly.

Common POV Cycling Video Mistakes
Most problems come from a few predictable setup errors.
The Camera Points Too Far Down
This usually happens when the angle is set while standing upright.
Fix it by:
- Adjusting the camera in your riding posture
- Tilting a chest-mounted camera slightly upward
- Testing both seated and standing positions
- Rechecking strap tension
The Footage Is Too Shaky
Common causes include:
- Loose screws
- Too many adapters
- A long extension
- A vibrating mounting point
- Weak low-light stabilization
- A damaged mount
- Start by simplifying the setup.
The Horizon Is Crooked
Possible causes include:
- An uneven mounting base
- A twisted chest strap
- A loose adapter
- A camera that is not fully seated
- Rider posture
- Incorrect horizon settings
Check the physical alignment before trying to correct everything in software.
The Footage Feels Uncomfortable to Watch
Too much head movement, extreme lens distortion, and constant shaking can make even fast footage tiring.
Try:
- Shorter POV clips
- A more stable mount
- A less extreme field of view
- Fewer abrupt direction changes
- More static supporting shots
- Cleaner editing
The Battery Dies Too Quickly
Battery life drops faster with:
- High resolution
- High frame rate
- Strong stabilization
- Low temperatures
- Continuous screen use
- Wireless connections
- Older batteries
Choose settings for the length of the ride, not simply the highest available quality.
A TELESIN multi-battery charger and protective battery case can be useful for long routes and multi-day trips.
Mud or Rain Ruins the Shot
Check the lens before recording and during safe stops.
Carry:
- A microfiber cloth
- A lens protector
- A dry storage pouch
- Weather-appropriate housing
- Protective caps
- Clean and dry everything before storage.
POV Cycling Safety Checklist
The camera should never interfere with your ability to ride safely.
Before the Ride
Check that:
- The mount is secure
- The camera is locked
- The tether is attached
- Your view is clear
- Cables and controls move freely
- The angle has been tested
- Battery and storage are sufficient
- Local filming rules are understood
During the Ride
Do not:
- Adjust the camera while moving
- Stare at the screen
- Hold a phone
- Operate a drone
- Perform dangerous actions for a shot
- Ignore road or trail rules
- Continue with a loose mount
Stop safely before touching the setup.
After the Ride
Inspect:
- Buckles
- Screws
- Straps
- Clamps
- Adapters
- Adhesive bases
- Safety tethers
- Lens protection
- Back up important footage before formatting the card.
How to Clean and Store Cycling Camera Accessories
Outdoor gear lasts longer when dirt, moisture, and wear are dealt with early.
Clean Mounts After Wet or Muddy Rides
Remove dirt before it dries inside buckles, joints, and threads.
Where appropriate:
- Brush away loose debris
- Rinse off mud gently
- Avoid pushing grit deeper into moving parts
- Dry every component
- Check metal parts for corrosion
- Do not seal wet straps inside a bag
After coastal rides, remove salt residue as soon as possible.
Inspect Straps, Clamps, and Adapters
Look for:
- Cracks
- Bent parts
- Worn locking teeth
- Loose joints
- Stretched straps
- Damaged threads
- Weak adhesive
- Missing components
Replace damaged mounting parts rather than improvising a repair before a ride.
Store the Kit Properly
Keep cameras, batteries, lenses, and adapters protected from impact, moisture, and heat.
A structured TELESIN storage case can separate:
- Charged batteries
- Used batteries
- Memory cards
- Adapters
- Lens accessories
- Cleaning tools
It also makes it easier to see whether something is missing before you leave.
Frequently Asked Questions About POV Cycling Videos
Q: What Is the Best Camera Position for Cycling POV Videos?
A: For many riders, a chest mount offers the best balance of stability, immersion, and visibility of the bike. A helmet or chin mount works better when you want the camera to follow your line of sight. A handlebar mount is easier to access, but it usually picks up more vibration.
Q: Is a Chest Mount or Helmet Mount Better for Cycling?
A: A chest mount usually produces steadier footage and shows more of the bike, including the handlebars and your hands. A helmet mount feels closer to the rider’s actual view, but every head movement affects the shot. Choose a chest mount for a stable main POV and a helmet mount for a more natural rider-eye perspective.
Q: What Camera Settings Are Best for Cycling Videos?
A: Start with a high-resolution recording mode, a standard frame rate, a wide field of view, and moderate stabilization. Use a higher frame rate for fast descents, technical sections, or slow-motion footage. Always test the settings on the actual terrain before recording a full ride.
Q: Should I Use 30 FPS or 60 FPS for Cycling?
A: A standard frame rate such as 30 FPS is usually suitable for long rides and normal-speed playback. A higher frame rate such as 60 FPS is better for fast action and slow motion, but it uses more storage and battery power and may perform worse in low light.
Q: How Do I Stop Cycling Footage From Shaking?
A: Start by shortening the mounting setup and tightening every connection. Avoid unnecessary extension arms and adapters, and move the camera to a more stable position if needed. Electronic stabilization helps, but it cannot fully correct a loose or flexible mount.
Q: How High Should I Angle a Chest-Mounted Camera?
A: Adjust the camera while sitting in your normal riding position. Because most cyclists lean forward, a chest-mounted camera often needs to point slightly upward. Record a short test that includes seated and standing riding before finalizing the angle.
Q: Can I Use a Handlebar Mount on Mountain Bike Trails?
A: Yes, but rough trails can transfer significant vibration through the handlebar. Keep the mount compact, tighten every connection, and test it on a short section first. For technical terrain, a chest or helmet mount may produce more stable main footage.
Q: How Do I Reduce Wind Noise While Cycling?
A: Use a compatible wind-reduction cover, test different camera positions, or record audio separately. At higher speeds, wind noise may still be difficult to eliminate. For instructional or travel videos, adding voice-over during editing is often the cleanest option.
Q: Should I Use a Safety Tether While Cycling?
A: A safety tether is a useful secondary safeguard, especially on rough terrain. It can reduce the risk of losing the camera if the main mount comes loose. However, it should never replace correct installation or regular mount checks.
Q: Can I Film POV Cycling Videos With a Smartphone?
A: A securely mounted smartphone can work for certain cycling shots, but an action camera is generally more practical for compact, stabilized POV footage. Smartphones are especially useful for route introductions, static clips, rest-stop updates, and behind-the-scenes content.
Final Tips for Better POV Cycling Videos
The best POV cycling setup is not the one with the most accessories or the highest settings. It is the setup that stays secure, captures the route clearly, and lets you focus on riding.
Beginners should start with one dependable main mount and simple camera settings. Learn how body position, terrain, and camera angle affect the footage before adding extra gear.
Mountain bikers should prioritize stability, lens protection, and a safety tether. Road and long-distance riders should pay closer attention to battery life, wind noise, and comfort.
Creators can build a stronger story by combining one main POV with a few carefully chosen smartphone, frame-mounted, or drone shots.
TELESIN makes photography accessories for action cameras, smartphones, and drones, with a focus on practical outdoor use. The aim is not to carry more gear. It is to build a setup that works reliably when the road gets rough, the weather changes, or the ride lasts longer than expected.
Choose the mount, power, protection, and supporting accessories that fit the way you actually ride.