


If your vlog footage looks shaky, “floaty,” or inconsistent—especially when you walk and talk—you’re not alone. Phone cameras are powerful, but your hands, steps, and quick framing changes can easily introduce micro-shakes that make video feel amateur.
A phone camera grip helps because it gives you a larger, more ergonomic hold, steadier leverage, and better control over movement. With the right grip technique and a few simple camera settings, you can get smoother shots with less cropping from stabilization—so your footage stays sharper and more “cinematic” straight out of camera.
The Fastest Way to Get Steady Vlog Shots with a Phone Grip

To stabilize handheld phone video, use a two-hand “triangle” hold (elbows tucked), walk heel-to-toe with slightly bent knees, and move your body—not your wrist—when panning. Lock focus/exposure, choose a wider lens when possible, and let software stabilization do less work by shooting steadily in the first place. A magnetic, ergonomic grip with physical controls makes it easier to keep movements smooth and consistent.
1-Minute Checklist Before You Hit Record
Use this quick checklist to instantly improve stability and consistency:
- Secure your phone firmly (magnetic mount engaged, no wobble)
- Enable stabilization (EIS/OIS/Enhanced Stabilization if available)
- Choose a steadier lens: 0.5x or 1x (wider usually looks steadier)
- Lock exposure and focus (AE/AF Lock) for consistent brightness
- Set a practical format: 4K 30fps for most vlogs; 1080p 60fps for fast movement
- Leave a little space around your framing (stabilization and editing can crop edges)
- Plan your move: pan slowly, and avoid sudden stops
Why a Phone Camera Grip Makes Footage Look Instantly Steadier
A grip doesn’t “magically” stabilize video—but it makes stable shooting much easier:
- Better leverage, less micro-shake: A longer, hand-filling handle reduces tiny hand tremors that phones pick up.
- More consistent handling: You hold the camera in the same position every time, which improves shot repeatability.
- Real control over timing: Physical shutter and control dials help you start/stop shots smoothly and avoid jabs on the screen that create a visible shake.
- Cleaner footage with less digital correction: When your handheld movement is already smooth, software stabilization crops less and preserves more detail.
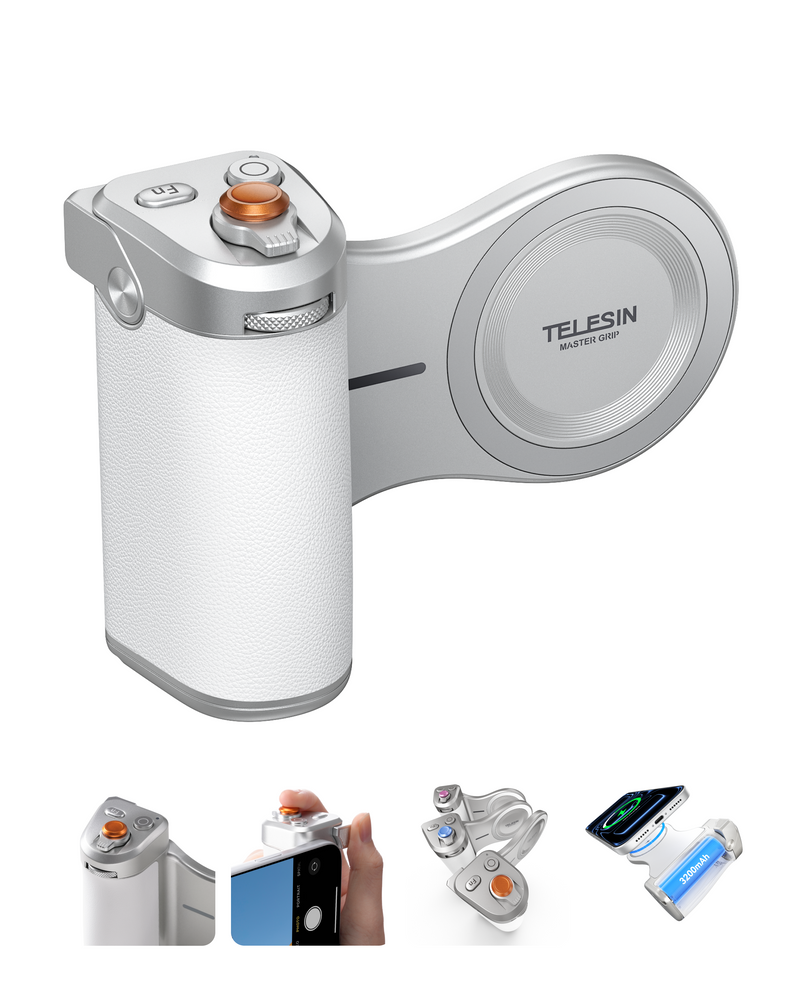
This is where something like the TELESIN Magnetic Pro Shot Imaging Camera Grip fits naturally into a creator workflow: the ergonomic magnetic grip design improves handling stability, while mechanical controls (shutter, precision dial, Fn keys) help you operate the camera without poking the screen and ruining the shot.
Choose the Right Grip Setup for Your Shooting Style
Different vlog styles need different stability strategies. Match your technique (and setup) to how you film most often.
Sit-Down Talking Vlogs (Desk / Indoor)
Best stability goal: locked framing and consistent eye-level angle.
Use your grip as a stable handle for quick positioning, then rest on a mini tripod (if you have one).
Lock AE/AF so lighting doesn’t “pump” when you move slightly.
If you use a creator kit setup, keep your light and mic position consistent for repeatable results.
Walk-and-Talk Vlogs (Street / Travel)
Best stability goal: smooth forward motion with minimal bounce.
Two-hand grip is the biggest upgrade (more below).
Wider lens (0.5x) often looks steadier.
Physical controls help: starting/stopping recording via a mechanical shutter feels more controlled than tapping glass while walking.
Action / Fast Movement (Crowds / Events / Quick Turns)
Best stability goal: minimize jerky direction changes.
Prioritize steadier movement technique first: slower pans, fewer sudden stops.
Use 60fps if your phone struggles with motion blur.
Keep your camera moves short (5–8 seconds per clip) to reduce fatigue and micro-shake buildup.
Step-by-Step: How to Stabilize Shots Using a Phone Camera Grip

This is the core technique that works for most creators—even without a gimbal.
Step 1: Mount Your Phone Securely (Stability Starts Here)
Any looseness becomes visible shake.
Make sure the magnetic attachment is fully engaged and centered.
Check for wobble: gently twist the phone; it should not shift.
Confirm the camera lenses aren’t blocked and the grip doesn’t interfere with wide-angle framing.
If you’re using a flash combo or accessories, re-check balance so the setup doesn’t tilt to one side.
Step 2: Use the Two-Hand “Triangle” Hold (Most Stable for Vlogging)
This single change is often the biggest stability upgrade.
Main hand: hold the grip firmly.
Support hand: lightly support the top/side of the phone or the upper grip area.
Tuck elbows toward your body to create a stable “triangle” base.
Keep wrists neutral; avoid gripping only with fingertips.
Why it works: two hands + elbows in reduces micro-tremors and prevents “wrist steering,” which causes jittery pans.
Step 3: Walk Heel-to-Toe with Soft Knees (Your Body Becomes the Stabilizer)
If your footage bounces, it’s usually your steps.
Walk heel-to-toe: let the foot roll forward rather than slap down flat.
Slight knee bend: think of your legs as shock absorbers.
Keep your upper body calm: the phone should feel like it’s “floating” on a stable torso.
Vlogger tip: if you’re talking to camera while walking, slow down slightly. Smoothness beats speed.
Step 4: Pan and Tilt with Your Body, Not Your Wrist
Wrist movement is fast and jittery. Body movement is slower and smoother.
For pans: rotate from your waist/hips, keeping the grip stable.
For tilts: use a controlled elbow movement or slight torso lean.
Aim for 3–5 seconds per pan—slow enough to look intentional.
Step 5: Lock Focus and Exposure to Prevent “Pulsing”
Many “unstable” clips feel unstable because brightness and focus keep changing.
Tap and hold to lock AE/AF on your subject.
If you’re moving between shadows and sun, consider locking exposure slightly lower to avoid blown highlights.
Step 6: Let Stabilization Help, Not Overcorrect
Strong digital stabilization can create warping (“jello”) or heavy cropping.
If your video looks warped: reduce stabilization strength and slow down movement.
Shoot steadier instead of relying on software to fix everything.
Pro Tips for Cinematic Vlog Shots Without a Gimbal
These techniques make handheld footage look more expensive.
Use a Wider Lens for Walk-and-Talk
Wider lenses hide micro-shake better. Keep your subject centered to avoid edge distortion.
Keep Clips Short and Intentional
Short, steady clips (5–8 seconds) look cleaner than long, shaky takes—especially outdoors.
Add a “Foreground Anchor”
Passing a lamp post, railing, or doorway in the foreground can create a cinematic sense of movement while the subject stays steady.
Make Color Consistency Part of “Stability”
Color shifts can make footage feel messy even when it’s physically stable. A creator-oriented workflow that keeps a consistent look helps your videos feel more professional. If you use a setup like TELESIN’s Reef Color App with AI Master Filters, apply a consistent filter profile across clips to make edits feel smoother and more cohesive.
Common Problems and Quick Fixes (Troubleshooting)
Use this section to fix the most common stability killers.
Problem: My footage is still shaky
Likely causes:
- One-hand holding
- Elbows flared out
- Walking too fast
Fix:
- Switch to the two-hand triangle hold
- Tuck elbows in
- Slow down and walk heel-to-toe
Problem: The video looks “jello-like” or warped
Likely causes:
- Strong EIS + fast direction changes
- Quick wrist pans
Fix:
- Lower stabilization strength
- Pan slower using your body
- Shoot shorter clips
Problem: Stabilization crops too much
Likely causes:
- Over-relying on software stabilization
- Starting with tight framing
Fix:
- Leave more space in framing
- Stabilize physically first (two-hand hold + soft knees)
- Use a wider lens
Problem: My hand gets tired quickly
Likely causes:
- Grip too small or awkward
- Holding far from your body
Fix:
- Use an ergonomic, hand-filling grip
- Bring elbows closer to your torso
- Take short breaks and shoot in short takes
Recommended Creator Setups (Grip-First, Vlogger-Friendly)

You don’t need a complicated rig. Choose a setup that matches your filming style.
Setup 1: Everyday Steady Vlogging (Fast to Deploy)
Best for: daily vloggers, travel creators, street shooting
Core idea: ergonomic grip + stable technique = smoother footage immediately
Magnetic phone camera grip with a comfortable, secure hold
Physical shutter button for cleaner start/stop timing
Control dial + Fn keys for quick adjustments without tapping the screen
Setup 2: Pro-Style Control on a Phone (More Consistent Results)
Best for: creators who want repeatable shooting settings across clips
Core idea: fewer screen taps, more controlled operation
Mechanical shutter + precision control dial for smoother operation
Customizable Fn keys for quick workflow actions
Consistent color workflow using Reef Color App + AI Master Filters
Setup 3: Longer Shooting Sessions (All-Day Filming)
Best for: long travel days, event coverage, continuous content
Core idea: less battery anxiety, fewer interruptions
3200mAh battery inside the grip
Wireless charging support for iPhone (so you can keep shooting longer)
Setup 4: Low-Light Vlogging Upgrade (Optional Flash Combo)
Best for: indoor/night vlogs, restaurants, street night scenes
Core idea: stable hold + reliable lighting = cleaner footage
Optional Creator Flash Combo Kit with integrated magnetic flash
Consistent exposure and more usable footage in challenging light
FAQs
Q: Do phone camera grips really stabilize video?
A: Yes. A grip improves leverage and handling, reducing micro-shake and making your movements smoother so software stabilization doesn’t need to crop as much.
Q: What’s the best grip technique for walking shots?
A: Use a two-hand triangle hold with elbows tucked, walk heel-to-toe with soft knees, and keep pans slow using your torso rather than your wrist.
Q: Should I use 0.5x or 1x for steadier footage?
A: 0.5x often looks steadier because wider angles hide shake better, but keep your subject centered to reduce edge distortion.
Q: Why does my video look warped or “jello-like”?
A: Fast movements plus strong electronic stabilization can cause warping. Slow your camera moves, reduce stabilization strength, or shoot shorter clips.
Q: Does stabilization reduce video quality?
A: It can. Strong stabilization may crop the frame and soften detail. Shooting steadier first preserves more resolution and sharpness.
Q: Is a grip better than a gimbal for vlogging?
A: For quick walk-and-talk vlogs, a grip is faster, lighter, and easier. A gimbal is better for running shots and complex camera moves.
Q: How do physical shutter buttons help stability?
A: They reduce the need to tap the screen, which often causes a visible shake—especially when you’re walking or holding the phone one-handed.
Q: How can I shoot longer without worrying about battery?
A: Use a grip with built-in power (like a 3200mAh battery) and, if compatible, wireless charging so you can film for extended sessions.
Q: What’s the easiest way to make my vlog look more “pro” instantly?
A: Combine steadier handling (two-hand hold + heel-to-toe walk) with consistent exposure/focus locking and a consistent color look across clips.
Final Takeaway
If you want steadier phone footage, the secret isn’t a complicated rig—it’s stable technique, consistent settings, and a grip that makes those habits easier. Start with the triangle hold, walk heel-to-toe, and move your body smoothly. Once your handheld movement improves, everything else—sharpness, stabilization, and color consistency—gets better faster.

